How to Safely and Easily Remove Window Shades
Removing window shades may seem simple, but doing it incorrectly can lead to unnecessary damage or frustration. Whether replacing old shades with new ones, preparing for a deep clean, or making room for a different window treatment, following the proper removal steps ensures a smooth and hassle-free process. This guide will walk you through each step, from gathering the right tools to properly disposing of the shades so you can complete the job safely and efficiently.
What Is the Process for Safely Removing Shades?
Removing window shades may seem simple, but following the proper steps ensures safety and prevents damage to the window frame and hardware. Using the correct tools and techniques, you can efficiently remove your shades without hassle.
Gather Necessary Tools
Before starting, gather the essential tools to make the removal process more manageable and safer. Having everything ready will help you avoid interruptions.
Screwdriver/Power Drill: Flat-Head or Phillips, Depending on Screws
Most window shades are secured with screws, so you'll need a drill and drill bit or screwdriver that matches the type of screws used. A Phillips screwdriver works for cross-head screws, while a flat-head screwdriver is necessary for slotted screws.
Ladder or Step Stool: For High Window Treatments
If your shades are installed high up, a sturdy ladder or step stool will help you safely reach them without stretching or straining. Before climbing, ensure the ladder is on a stable surface.
Pliers: For Removing Stubborn Hardware
In some cases, brackets or clips may be tight or difficult to remove by hand. A pair of pliers can help loosen stubborn fasteners without damaging the wall or window frame.
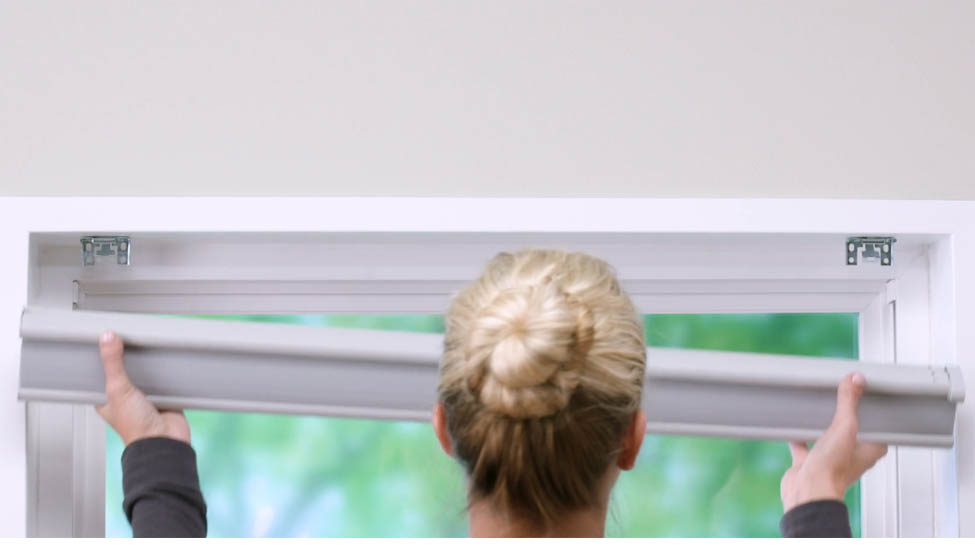
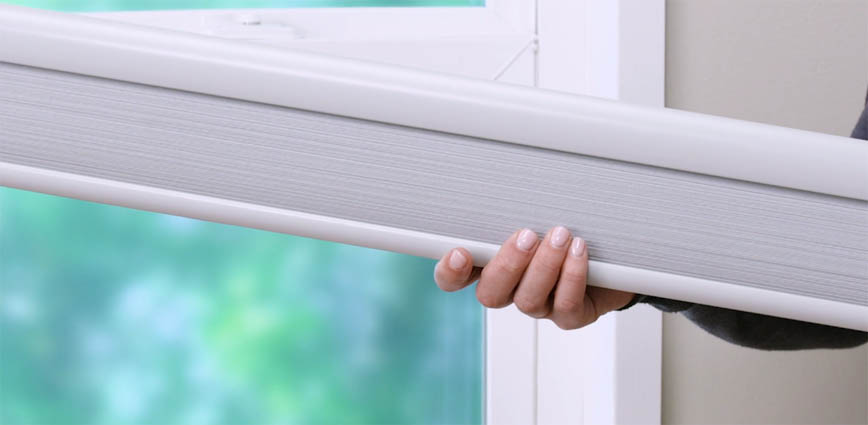
Raise the Shade Completely
Before removing the shade, raise it up completely. This makes it easier to detach the shade from the brackets and to handle once you remove it. For horizontal blinds, leaving a gap at the top (not fully raised) can help you hold the headrail directly by gripping it in the space between slats at the top of the blind.
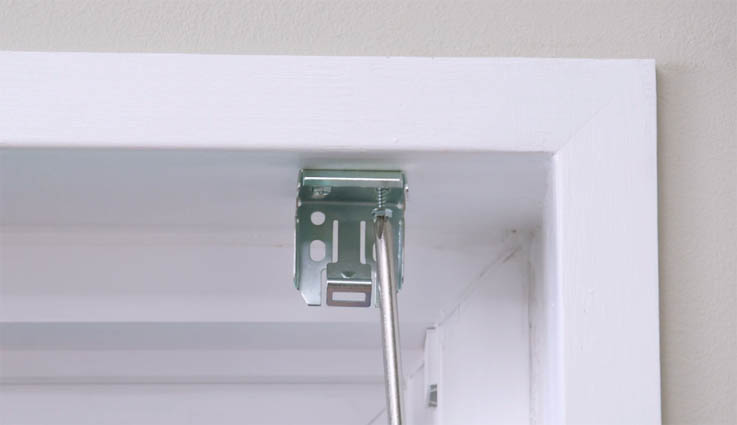
Remove the Shade from Its Brackets
Most shades are attached to mounting brackets at the top of the window. Depending on the type, you may need to:
- Press a release tab or lever to free the shade
- Push the top of the shade backwards or forwards and then tilt it downwards to unhook it
- Unscrew the brackets holding the shade in place
- Slide or tilt the shade out of its holder
Support the shade while detaching it to prevent sudden drops or damage.
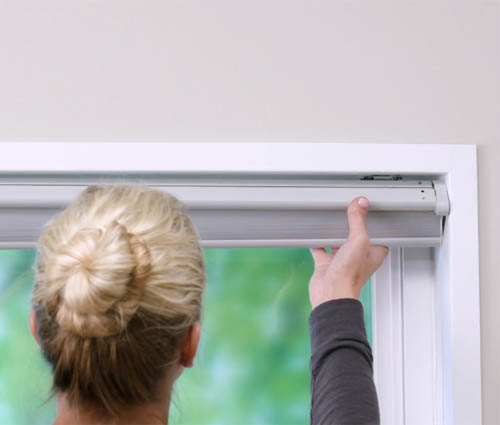
Detach Any Safety Clips or Mounts
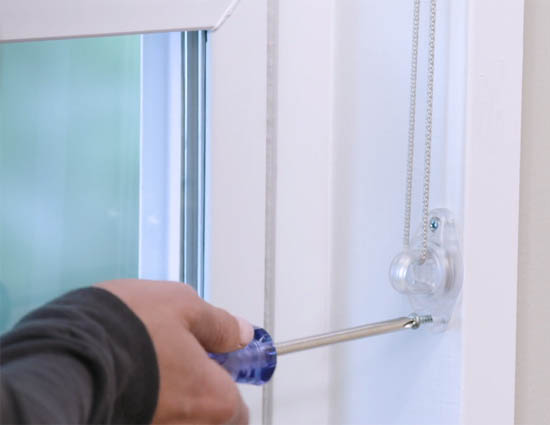
Some shades have additional safety clips or cord tensioners installed to prevent hazards. Before removing the hardware, carefully detach any clips, chains, or tension devices securing the shade. Then unscrew the mounting brackets. You can then install your new blind or shade.
Store or Dispose of the Shade Properly
Once the shade is removed, decide whether to store, reuse, or dispose of it:
- Reinstalling Later? Store it in a clean, dry place to prevent dust buildup.
- Donating? If the shade is in good condition, consider donating it to a local charity or reuse center.
- Disposing? Check local recycling options for responsible disposal, especially for plastic, fabric, or metal shades.
Following these steps ensures a safe and efficient window shade removal process without damaging your window or surrounding area. And if you're considering installing a new window treatment, learn more about Installing Blinds Outside the Window Frame for a stylish and functional alternative.
- Dining Room Window Treatments: Light, Privacy & Style GuideBlinds, Shades & ShuttersDesign & Decor
- Statement Window Shades IdeasBlinds, Shades & ShuttersDesign & Decor
- Trending Window Covering Colors for 2026Design & Decor
- Color Drenching for Window CoveringsBlinds, Shades & ShuttersDesign & Decor
- The Fastest Way to Change a Room's Look? Start With the WindowsBlinds, Shades & ShuttersDesign & Decor