How to Remove Shades from Windows: Step-by-Step Instructions
Alright, so you've decided it's time to take those shades down. Maybe you're changing up your décor or just need to clean the shades, but either way, you're probably wondering where to even start. Well, don't stress—it's actually a lot easier than it seems. I'll walk you through it, step by step, so you can get it done without any hassle.
Step 1: Grab Your Tools
Before you do anything, you're gonna want to make sure you have everything you need. It's a pain to get halfway through and realize you've forgotten a tool. Here's what you'll probably need:
- A screwdriver or drill (if you're working with screws)
- A flathead screwdriver (to pry out any clips or brackets)
- A ladder or step stool (if your shades are high up)
- Maybe some gloves (just to keep your hands safe and the shades clean)
Once you've got all that together, you're ready to go. Just make sure you have a clear space nearby to set the shades down once they're off the window.
Step 2: Check Out How It's Mounted
Now, let's take a quick look at how the shades are mounted. Usually, they're clipped in place in some kind of mounting bracket, or screwed directly into the window casing or wall. If you got your shades from Blindster, it might be the kind that's easy to remove—especially if it uses a snap-in system. No worries, you'll figure it out.
- Clips: Some shades are mounted with clips, which are pretty easy to detach once you know what you're dealing with.
- Screws: Check the top or sides for screws. If there are any, you'll need your drill or screwdriver to remove them.
It's like figuring out the puzzle pieces before you actually start putting them together.
Step 3: Raise the Shades
Now, raise the shades up all the way. This makes it way easier to access the brackets or screws. If your shades are manual, just raise them up to the highest point.
If you've got motorized shades, use the remote to raise them. Then make sure to turn them off and detach them from any external power supplies. That way, you won't have any surprises halfway through.
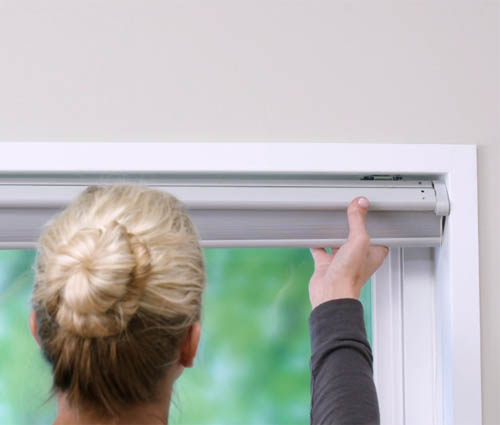
Step 4: Disconnect Everything
Alright, here comes the tricky part—disconnecting the shades. Don't worry, it's not as bad as it sounds.
- Clips: If it's a clip system, all you need to do is carefully remove the shades from the clips. You might need to gently pry them open with a flathead screwdriver, but don't force anything. Just a little nudge will do. With some clips, you can pull the headrail of the shades forward, push them backward, or rotate them downwards to disconnect one side of clips and then rotate the shade away to fully remove them.
- Screws: If they're screwed in, just unscrew the brackets holding the shades up. Start with the screws on the sides and work your way toward the middle. Be sure to support the shade as you're doing this so it doesn't pull free from the last screws and damage the wall or the shade.
If you're working with a motorized shade, disconnect the power source or use the remote to fully disconnect it. Always follow the instructions that came with it to be safe. If the motorized shades are hardwired, you may need to consult an electrician to be sure the current isn't live as you're removing the shade.
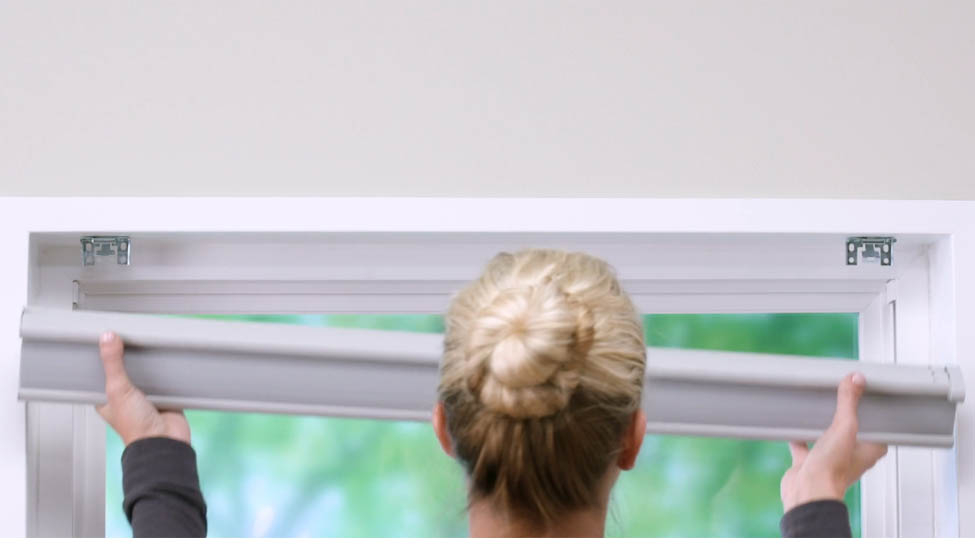
Step 5: Take the Shades Down
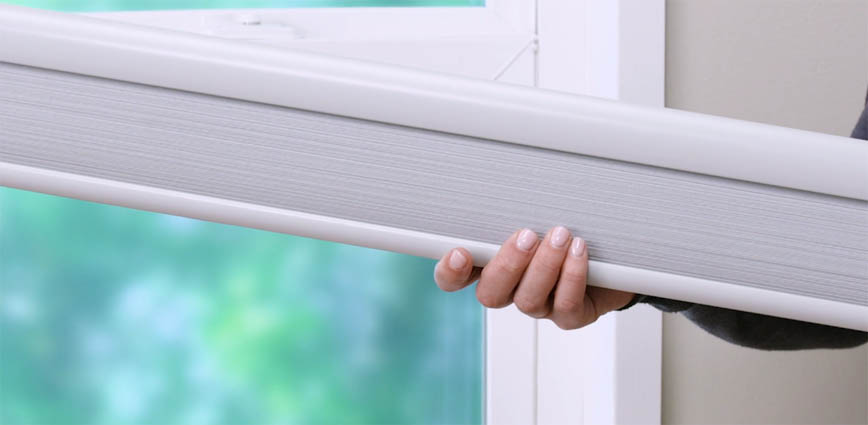
Now that everything is disconnected, you can actually take the shades down. For heavier shades (like faux wood or thick Roman shades), this might take a bit more effort. Be careful not to drop them or scratch the frame. You may need a helper for wider shades so that the shade is easier to handle.
If your shades were mounted with a snap-in system, they should come off with minimal fuss. If they're more tightly secured, you might need to lift them off carefully.
Step 6: Check the Mounting Hardware
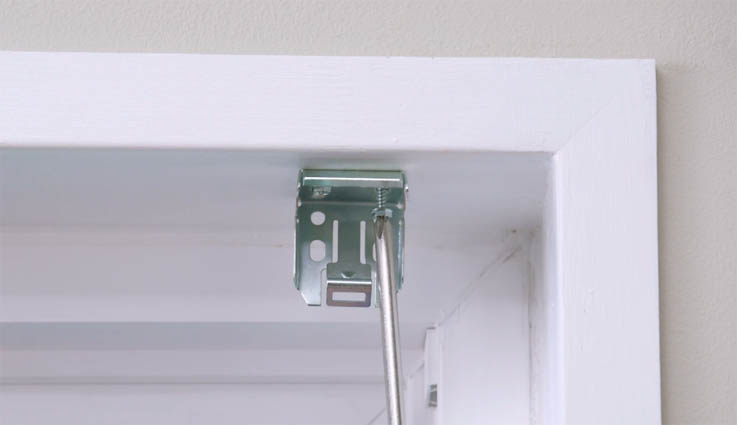
Once the shades are off, give the brackets or clips a quick inspection. Are they in good shape? If they're fine and you're putting the same shades back up, awesome—just give them a little wipe down and tightening if needed you're set.
But if you're swapping out shades for something new, you'll likely need to replace the mounting hardware that matches the new window covering. No biggie—ordering one of Blindster's many blinds and shades options will come with all the hardware and installation brackets you'll need.
Step 7: Clean the Shades (If You Want)
Now's a great time to clean your shades if you're keeping them. Once they're off, take a minute to clean them up before re-installing them (or swapping them for new ones). Follow the cleaning instructions based on the material. For example, if you've got Blindster's faux wood blinds, a simple dusting or a damp cloth should do the trick. If you've got fabric shades, using a vacuum with brush attachment may be all you need. Check the care instructions prior to using any water or cleaning agents.
Step 8: Reinstall or Replace
Alright, now the fun part. You can either reinstall your old shades or go for something new. If you're switching out, Blindster's got a ton of options, from classic Roman shades to super sleek cellular shades. No matter what you pick, installation is usually a breeze—just follow the instructions, and you'll be back in business in no time.
And that's it! Removing shades from windows is honestly way easier than it sounds. Just take it slow, make sure you've got the right tools, and remember—Blindster's got you covered if you need any new parts or window treatments. Keep it simple, and you'll have your shades down in no time.
- Dining Room Window Treatments: Light, Privacy & Style GuideBlinds, Shades & ShuttersDesign & Decor
- Statement Window Shades IdeasBlinds, Shades & ShuttersDesign & Decor
- Trending Window Covering Colors for 2026Design & Decor
- Color Drenching for Window CoveringsBlinds, Shades & ShuttersDesign & Decor
- The Fastest Way to Change a Room's Look? Start With the WindowsBlinds, Shades & ShuttersDesign & Decor