How to Install Blackout Blinds for Maximum Privacy
When it comes to privacy and controlling light, blackout blinds are one of the easiest and most effective solutions. Whether you're trying to keep your bedroom pitch dark for a restful sleep or simply want to block out street lights, these blinds do the trick. Installing them isn't as complicated as it sounds, and once in place, they'll add both functionality and style to your windows. Here's how you can get them up in no time.
Step 1: Measure Your Windows
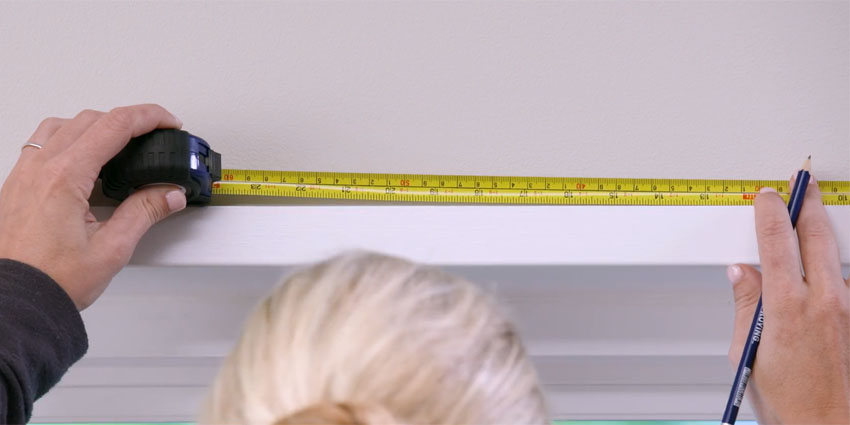
Before even thinking about installing, you'll need to make sure you've got the right size. Use a tape measure to check the width and height of the window. Be sure to measure in several places to account for any slight variations. Once you've got the measurements, you'll know exactly what you need. Blindster offers a wide variety of custom blackout blinds so you'll definitely find something that fits. If you're going to install the blinds outside the window opening, don't forget to add a couple of inches on all sides for full coverage or to allow for easy installation.
Step 2: Gather Your Tools
Now, you'll need the essentials. Grab a drill, screws, a screwdriver, a level (to avoid crooked blinds), and a pencil to mark where you'll place the brackets. It's helpful to have a second pair of hands, but it's not absolutely necessary if you're confident with power tools.
Step 3: Install the Brackets
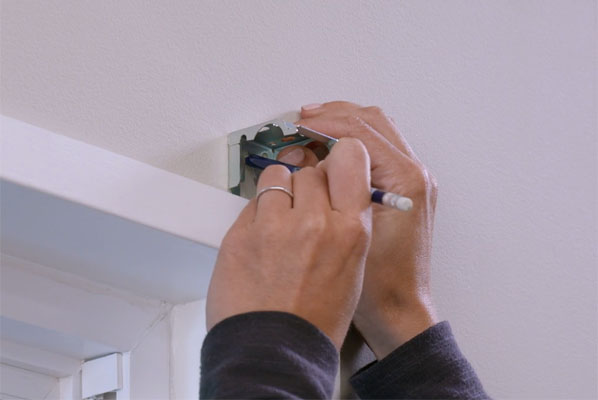
Start by marking where the brackets will go. You don't want to just eyeball it because misaligned brackets could cause your blinds to hang unevenly or not install correctly. Use your pencil to make light marks where the brackets will attach to the window casing or wall. Then, drill small pilot holes. Attach the brackets with screws. Make sure they're sturdy, and use the level for outside mount blinds to double-check their placement before tightening everything up.
Once that's done, it's time to move on to the fun part—hanging the blinds.
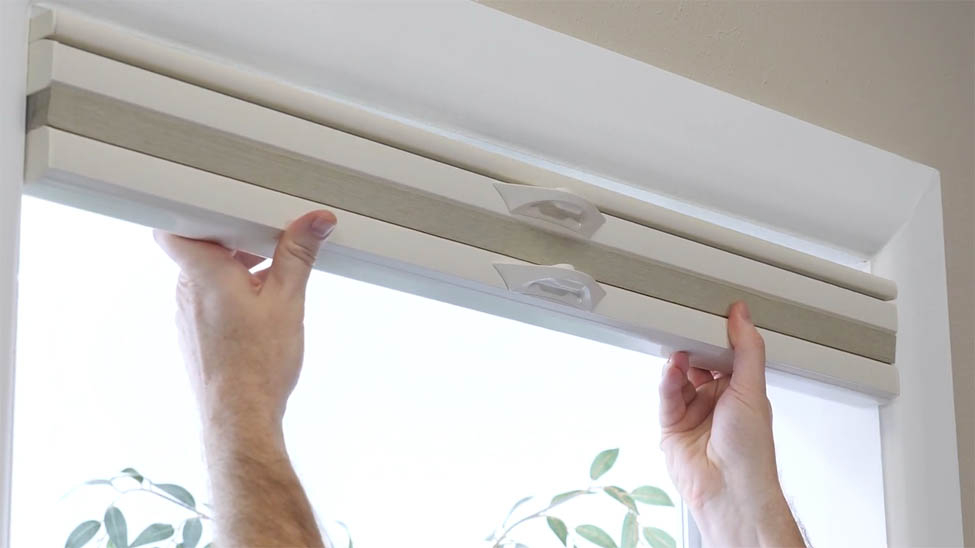
Step 4: Hang the Blackout Blinds
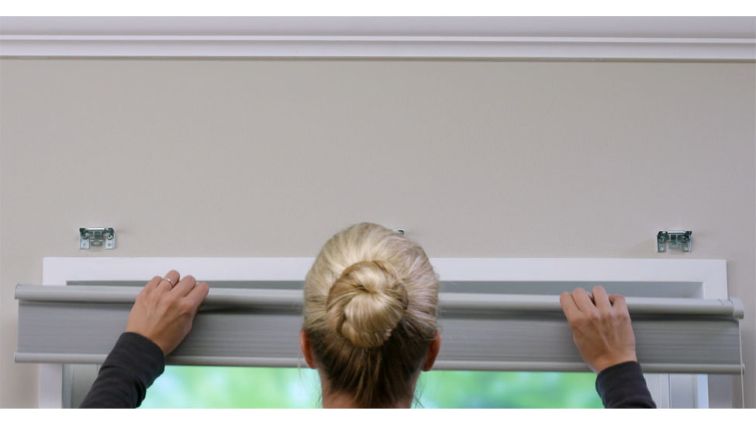
This part is pretty straightforward. Place the top of the blinds into the brackets. Depending on the type of blackout blinds you have, you might need to slide them into a track or simply hook them onto the brackets. Take your time here, making sure the blinds are sitting snugly in place. A little bit of patience goes a long way here—no one likes crooked blinds. Blindster offers a range of motorized blackout options for those who prefer convenience and ease of use. Simply follow the product-specific instructions for a seamless setup.
Step 5: Adjust and Enjoy
Once the blinds are up, give them a test. Pull them down to make sure they cover the window properly and block out the light. Adjust them as needed, whether that means moving the brackets slightly or repositioning the blinds. If you're happy with the fit, then congratulations—your blackout blinds are ready to go.
By the way, the beauty of blackout blinds is that they're not just practical—they're also stylish. Whether you opt for a sleek modern look or something more classic, you'll find a range of options that complement your décor. Blindster's custom blackout blinds are designed to fit any window perfectly, adding both form and function to your home.
Final Thoughts
Installing blackout blinds is pretty simple as long as you take your time with the measurements and bracket placements. Once installed, you'll be amazed at how much more private and peaceful your space becomes. With quality products from Blindster, you'll have peace of mind knowing your windows are covered—literally.
- Dining Room Window Treatments: Light, Privacy & Style GuideBlinds, Shades & ShuttersDesign & Decor
- Statement Window Shades IdeasBlinds, Shades & ShuttersDesign & Decor
- Trending Window Covering Colors for 2026Design & Decor
- Color Drenching for Window CoveringsBlinds, Shades & ShuttersDesign & Decor
- The Fastest Way to Change a Room's Look? Start With the WindowsBlinds, Shades & ShuttersDesign & Decor